Wednesday, May 19, 2010
Hey All :) The bad :( and good news :) of my day!
Ok so do you ever feel like everything is just going wrong? it can be so irritating... ok so with the bad news first to get that out of the way... I was recording my video of the flower that I posted to youtube and my flip died while I was filming so I plugged the it into my computer and let it charge... well I then unplugged it and was going to film another video and it will not turn on... but when I plug it in to my computer it turns on and then I cannot turn it off so I wrote flip and they say it is because it is not getting a charge :( so for now no videos unless I use my old digital camera which I just might have to do because I know have the good news to tell :)... I got my Create-A-Critter cartridge!!! :) I have wanted ever since it came out... I found it on Craft-E-Corner and it was only $46 something and I signed up for there news letter and got 10% off so I got it for $41.00 I couldn't believe it check them out they have all kinds of cartridges for really good deals... and I also got my dad to hang 3 new shelves I bought so I have more storage area I will be posting pics of that soon... and on top of all of that I got my Scrapbuck order today!!! :) I was so excited... I got in on there free shipping weekend they had and I have to say I just love scrapbuck even if they don't have the free shipping it is still a $7.99 base price not matter the size order and it got here in 2 days! I mean come on that is awesome!... They have all kinds of stuff and the website says 1,500 items for $1 and I mean they have brand name stuff I got Fiskars punches for $4... wow what a deal :)... ok well when I get my flip fixed I will start posting more videos but until then I will post pictures of the projects I do :)... Have a great day and Happy Crafting!
Sunday, May 16, 2010
Flower Video as Promised :)
Hey so here is the video I made to show you how to make the flower I had on my little book I posted :)... I was filming and I got the whole process of the flower but my camera died as I was doing the next step :(... So I went ahead and posted the video and figured I would just explain :)... After you have made the flower mist it with some glimmer mist and then just heat set it with your heat gun and you will have the same thing as the one on the book :)... ok enjoy the video and happy crafting! :)
Wednesday, May 12, 2010
Hey just a quick post
I watched one of Marion's (apieceofcraft) Ustream videos last night and she made a adorable mini book... so of course I had to give it a try :)... I made mine the same size she did at 2 1/4" x 2" and I really think it turned out cute... I decorated it with the Once Upon a Time Paper stack and a butterfly punched with my Martha Stewart punch... I also made the little flower and I will be adding a video soon of the process on how I made it... I then glimmer misted the flower and butterfly with Sweet Pea and Pearl... Really neat, really simple... O I also inked the edges with Tim Holtz Vintage Photo Distress Ink (my absolute favorite color :) Ok well that's it for my quick post...Happy Crafting!


More Simple Wall Art :)
Hey all... The other day I went to my local $1 store and found some really cool things... you would not believe the stuff I found they really had so much I think I could have just about $1'd my shelf to death :) Ok so one of the things I found was a pre-done Shadow box picture... well the box was white and pretty badly beat up and although the picture was neat it was not at all my style/taste... so I bought 2 :) and brought them home not really sure of what I was gonna do with them... I had bought some stickers a few months ago of a kimono, Japanese flag, sushi, origami and another pack that was cherry blossoms... so I decided to take apart the Shadow box... it was really easy, I just took an x-acto knife and cut around the edges and then pried the back off with my awl... I painted the white over with black and then covered up the picture with a piece of black cardstock and added the stickers in a way I liked, I also used some Pink Glitter letters I got from the Target scrapbook aisle... It was super easy and really looks great! :)... So here it is...


I really wish I had taken pictures as I made it but it didn't dawn on me until after I was done :(... O well maybe I can go back and get another one and add pictures of the process... I already finished the other one too :) So I may do that then... Next I am thinking I am being run by crafts I am just so blessed to own so many crafts I have them coming out of my ears lol :)SO I am looking into buying shelves for over my craft desk and then getting clear glass containers and putting buttons and bling and what not so when I save up enough to do that I will be sure to add pictures... Ok well as always have a great day and Happy Crafting! :)


I really wish I had taken pictures as I made it but it didn't dawn on me until after I was done :(... O well maybe I can go back and get another one and add pictures of the process... I already finished the other one too :) So I may do that then... Next I am thinking I am being run by crafts I am just so blessed to own so many crafts I have them coming out of my ears lol :)SO I am looking into buying shelves for over my craft desk and then getting clear glass containers and putting buttons and bling and what not so when I save up enough to do that I will be sure to add pictures... Ok well as always have a great day and Happy Crafting! :)
Monday, May 10, 2010
Simple Wall Art :)


Hey all I thought I would share a quick idea with you... as far as I know I have never seen this idea any where else so I am calling it mine, but it is probably not new :)... I used my Cricut and cut out letters spelling different words for my walls... as you know I love Japanese stuff so above my craft desk is Kawaii then above my bed is Lazy because I must admit I love to sleep lol :) I used SCAL and downloaded the fonts from dafont.com and 1001freefonts.com the kawaii is Annabel Script and then the lazy is Moonstar... on the kawaii I also used my Martha Stewart butterfly punch and added butterfly's my new favorite thing! I also added a little bling to the bodies and I added bling to the lazy and stars as well... to hang/place it on the wall I used very little snail adhesive... But I want to note I do not know how it will affect my wall over time I personally have had no problems removing and re-sticking them and changing them... BUT BE CAREFUL! I used the tombow snail... so please DO NOT use something that could damage your walls... Well I hope you like it just a quick and simple idea for wall art and to add a little something something to other wise bare walls... Also I am experimenting with dingbats (the picture fonts) I downloaded a pucca font and was able to make a very cute bumble bee card I also found a Mario font so I will be trying to make a card from that for my brother in-law... I will post a picture of the pucca sometime tomorrow and when/if I can make the mario card I will add a picture of that as well...I hope you will give it a try... Have a great day and Happy crafting!
Monday, May 3, 2010
NSD Challenge #1 - "Mother Dear, I Love You So"

Here is the card I made for NSD Challenge #1 - "Mother Dear, I Love You So", and I have to admit I love how this one turned out especially since I made the SVG for the actual card :)
NSD Challenge #12 - "Critter-licious"
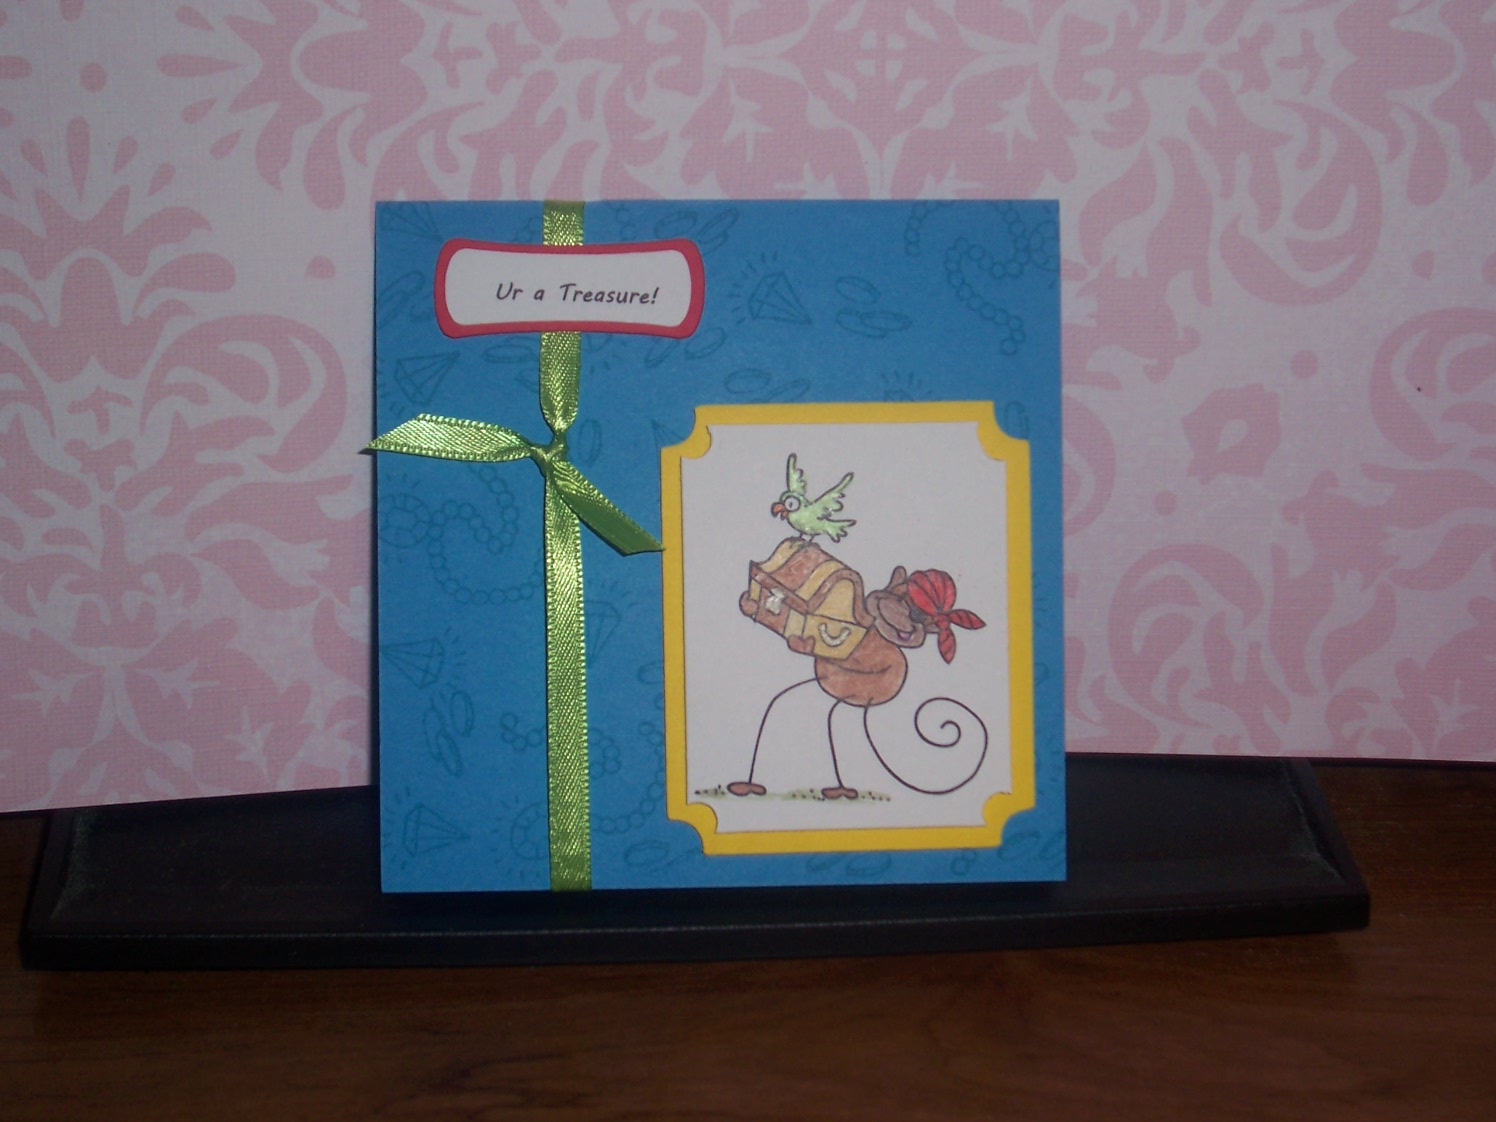
Here is the card I made for NSD Challenge #12 - "Critter-licious"
NSD Challenge #7 - "Hey Dad!"

Here is the card I made for NSD Challenge #7 - "Hey Dad!", I know it is really hard to see but the silver square at the top says Thank You :)
NSD Challenge #3 - "Thinking Outside the Box"

Here is the card I made for NSD Challenge #3 - "Thinking Outside the Box", Which I must add I really like how it turned out I never could use buttons that easily so I thought it is a challenge so I will give it a try :)
NSD Challenge #2 - "Getting Scrappy"

Here is the card I made for NSD Challenge #2 - "Getting Scrappy"


Subscribe to:
Posts (Atom)